Easy DIY Home Speakeasy Room
This DIY Home Speakeasy Room blog was written by a paid contributor. All photos were taken by Briana Colangelo.
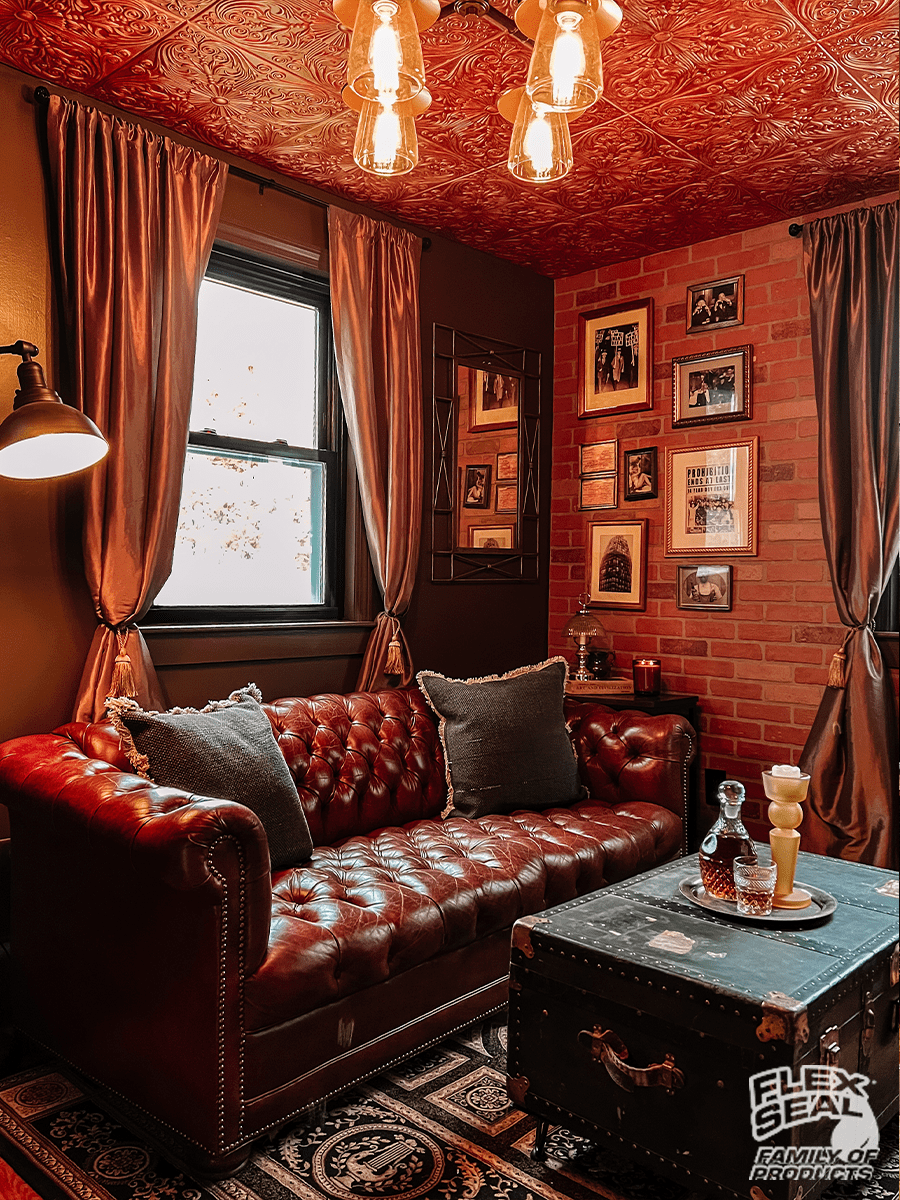
In my many years as a DIY-er, I’ve learned how to create beautiful spaces on a budget. I love the old-timey feel of a speakeasy room, so much so that I decided to transform a boring extra bedroom into a stylish and old-timey home speakeasy.

Speakeasys came about in the 1920’s during the prohibition era, when alcohol was banned in the United States. These secret underground bars were often hidden behind fake doors or located in unsuspecting places. Speakeasys have a very eclectic and old vibe to them, so I knew some major changes needed to happen to my current room in order to achieve that look. Some home speakeasy ideas that quickly came to mind were to use faux brick panels and tin tiles to truly transform the space and build from there. The result exceeded my expectations!
If you’d like to know how to create a speakeasy room, keep reading and I’ll guide you through my process for this project.
Materials
● 3 Flex Glue MAX cartridges
● Caulking gun
● Faux brick panels
● 20x20 foam faux tin tiles
● Jigsaw
● Circular saw
● Pencil
● Scissor or utility knife
● Measuring tape
Note: Quantities will be dependent on room measurements and tile sizes chosen. I ended up needing 41 tiles for my 9’x12’ ceiling and 2 faux brick panels for my 9’x7.5’ feature wall.
Steps
1. Prepare Your Area
The first step is to prep! I started by removing any nails from my wall and then thoroughly cleaned its surface to ensure it was free from any grease or dirt.
2. Size Your Brick Panels
I measured the faux brick panels for my feature wall to the sizes I needed.

Once my measurements were correct, I cut the boards with my circular saw and jigsaw.
Note: Use caution when working with power tools and always follow manufacturer’s instructions.

3. Attach Brick Panels to Wall
Next it was time to adhere the faux brick panels to the feature wall. Flex Glue MAX was perfect for this big job. The 28 oz caulking gun cartridge made attaching the boards to the wall easy and fast. After I applied the glue to the back of the boards, I held each brick panel against the wall for around 30 seconds, making sure to press all areas of the panel securely into place.


4. Attach Ceiling Tiles
Once my feature wall was done, I moved onto the ceiling. I wanted a very moody home speakeasy room vibe, so I decided to add a fancy faux tin ceiling! The amount you’ll need will depend on your ceiling measurements and the size of the tile you choose. You may also need to trim some of the faux tiles with a scissor or utility knife to get a perfect fit.

I outlined the back of my first tile with Flex Glue MAX and added a dollop to the center for good measure. Then, I applied the tile to the ceiling, making sure to hold it in place for around 30 seconds. I repeated this process until all the tiles were glued to the ceiling.


Flexpert Tip: If you happen to place a tile unevenly, you’ll have a few seconds of re-adjusting time before the instant grab takes hold and locks the tile into place. Not a single tile fell after the instant grab!

After the brick wall and ceiling were attached, I let them fully cure for 7 days before adding any décor to the walls.
To complete my home speakeasy space, I incorporated some vintage looking furniture and accents to compliment my faux brick wall and ceiling tiles. I added some black curtain rods with thrifted curtains, created a wall collage out of old thrifted frames and added some prints from the prohibition era. I also changed out the light fixture and put in some amber coloured lights to give the room a dimmer look. Threw in a new rug, vintage trunk and some decor pieces, and the room was complete! I am so thrilled with how this room turned out – it’s exactly what I was going for and it’s all thanks to Flex Glue MAX for helping to get this big project done!


By Briana Colangelo
Bri is a self-taught DIYer, who's had a passion for DIY projects since a young age. After buying a 1958 cape home, she has been slowly transforming each room in her house. Bri also shares her designs and DIY projects as a content creator on Instagram and TikTok @d.i.y.bri.


